How to Use Cloud Database in Android
Build an Android App Using Firebase and the App Engine Flexible Environment
This tutorial demonstrates how to write a mobile app with backend data storage, real-time synchronization, and user-event logging using Firebase. Java servlets running in the Google Cloud Platform (GCP) App Engine flexible environment listen for new user logs stored in Firebase and process them.
The instructions show how to do this using Firebase and the App Engine flexible environment.
If you want your app to process user data or orchestrate events, you can extend Firebase with the App Engine flexible environment to perform automatic real-time data synchronization.
The sample app, Playchat, stores chat messages in the Firebase Realtime Database, which automatically synchronizes that data across devices. Playchat also writes user-event logs to Firebase. To learn more about how the database synchronizes data, see How does it work? in the Firebase documentation.
The following diagram shows the Playchat client architecture.

A set of Java servlets running in the App Engine flexible environment register as listeners with Firebase. The servlets respond to new user-event logs and process the log data. The servlets use transactions to ensure that only one servlet handles each user-event log.
The following diagram shows the Playchat server architecture.

Communication between the app and the servlet happens in three parts:
-
When a new user logs into Playchat, the app requests a logging servlet for that user by adding an entry under
/inbox/in the Firebase Realtime Database. -
One of the servlets accepts the assignment by updating the value of the entry to its servlet identifier. The servlet uses a Firebase transaction to guarantee that it is the only servlet that can update the value. After the value is updated, all other servlets ignore the request.
-
When the user logs in, logs out, or changes to a new channel, Playchat logs the action in
/inbox/[SERVLET_ID]/[USER_ID]/, where[SERVLET_ID]is the identifier of the servlet instance and[USER_ID]is a hash value representing the user. -
The servlet watches the inbox for new entries and collects the log data.
In this sample app, the servlets copy the log data locally and display it on a web page. In a production version of this app, the servlets could process the log data or copy it to Cloud Storage, Cloud Bigtable, or BigQuery for storage and analysis.
Objectives
This tutorial demonstrates how to:
-
Build an Android app, Playchat, that stores data in the Firebase Realtime Database.
-
Run a Java servlet in the App Engine flexible environments that connects to Firebase and receives notifications when the data stored in Firebase changes.
-
Use these two components to build a distributed, streaming, backend service to collect and process log data.
Costs
Firebase has a free level of usage. If your usage of these services is less than the limits specified in the Firebase free plan there is no charge for using Firebase.
Instances within the App Engine flexible environment are charged the cost of the underlying Google Compute Engine Virtual Machines.
Before you begin
Install the following software:
- Git
- Android Studio 4.0 or higher
- A device or emulator running Android 8.1 (API level 27) or higher with Google APIs
- Apache Maven 3.6.x or higher
- Java 8 or higher
- Cloud SDK
Install the App Engine Java component of the Cloud SDK by running the following command from the command line.
gcloud components install app-engine-java Cloning the sample code
-
Clone the front end client app code.
git clone https://github.com/GoogleCloudPlatform/firebase-android-client -
Clone the backend servlet code.
git clone https://github.com/GoogleCloudPlatform/firebase-appengine-backend
Generating a SHA-1 fingerprint for the app
To authenticate your client app for Google Sign-in, you need to provide a SHA-1 fingerprint of the certificate. This tutorial uses the debug keystore. For information about creating release versions of the keystore fingerprint, see Authenticating Your Client.
-
Build a SHA-1 of your debug keystore.
keytool -list -v \ -alias androiddebugkey -keystore ~/.android/debug.keystore
Creating a Firebase project
-
Create a Firebase account or log into an existing account.
-
Click Add project.
-
If it's your first time on the page, click Create a project.
-
In Project name, enter
Playchat. -
Follow the remaining setup steps and then click Create project.
- You don't need to enable Google Analytics for this project.
-
After the wizard provisions your project, click Continue.
-
In the Project Overview page of your project, click Settings and then click Project settings.
-
Click the Android icon, which brings you to the Add Firebase to your Android app page.
-
In Android package name, enter
com.google.cloud.solutions.flexenv. -
In Debug signing certificate SHA-1, enter the SHA-1 value you generated in the previous section.
-
Click Register app.
-
Follow the steps in the Download config file section to add the
google-services.jsonfile to your project. -
Click Next in the Download config file section.
-
Make a note of the suggested changes to the project- and app-level
build.gradlefiles. -
Click Next in the Add Firebase SDK section.
-
Click Continue to console to complete the setup.
Creating a Realtime Database
-
From the Firebase console, select your project.
-
From the left menu of the console, select Realtime Database in the Build group.
-
Click Create database in the Realtime Database section.
-
Select a location close to you.
-
In the Security rules dialog, select Start in test mode and then click Enable.
This step displays the data you've stored in Firebase. In later steps of this tutorial, you can revisit this web page to see data added and updated by the client app and backend servlet.
-
In the Rules tab of the database, make sure you have the security rules for read/write. For example:
{ "rules": { ".read": "now < 1630641600000", // 2021-9-3 ".write": "now < 1630641600000", // 2021-9-3 } } -
Make a note of the Firebase URL for your project, which is in the form
https://[FIREBASE_PROJECT_ID].firebaseio.com/and appears next to a link icon.
Enabling Google authentication for the Firebase project
There are a variety of sign-in providers you can configure to connect to your Firebase project. This tutorial walks you through setting up authentication so that the user can sign in using a Google Account.
-
From the left menu of the Firebase console, click Authentication in the Build group.
-
Click Set up sign-in method or Get Started if it's your first time to the page.
-
Under the Sign-in method tab, select Google, turn the Enable toggle on, select the support email, and click Save.
Adding a service account to the Firebase project
The backend servlet doesn't use a Google Account to sign in with. Instead, it uses a service account to connect to Firebase. The following steps walk you through creating a service account that can connect to Firebase and adding the service account credentials to the servlet code.
-
From the left menu of the Firebase console, next to the Playchat project home, select the Settings gear and then Project settings.
-
Select Service accounts tab and then click the Manage service account permissions link.
-
Click Create Service Account.
-
Configure the following settings:
- In Service account name, enter
playchat-servletand then click Create And Continue. -
In Select a role, select Project > Owner and then click Continue.
-
Click Done.
- In Service account name, enter
-
Click the service account you just created, under the KEYS tab, click Add Key, and then click Create new key.
-
Next to Key Type, click JSON, and then click Create to download the key.
-
Save the downloaded JSON key file for the service account to the backend service project,
firebase-appengine-backend, in thesrc/main/webapp/WEB-INF/directory. The filename is in the formPlaychat-[UNIQUE_ID].json. -
Edit
src/main/webapp/WEB-INF/web.xmland edit the initialization parameters as follows:-
Replace
JSON_FILE_NAMEwith the name of the JSON key file you downloaded. -
Replace
FIREBASE_URLwith the Firebase URL you noted earlier.<init-param> <param-name>credential</param-name> <param-value>/WEB-INF/JSON_FILE_NAME</param-value> </init-param> <init-param> <param-name>databaseUrl</param-name> <param-value>FIREBASE_URL</param-value> </init-param>
-
Enabling billing and APIs for the Cloud Platform project
In order for the backend service to run on Cloud Platform, you need to enable billing and APIs for the project. The Cloud Platform project is the same project you created in Create a Firebase project and has the same project identifier.
-
In the Cloud Platform Console, select the Playchat project.
Go to the Projects page
-
Make sure that billing is enabled for your Cloud project. Learn how to confirm that billing is enabled for your project.
- Enable the App Engine Admin API and Compute Engine API APIs.
Enable the APIs
Building and deploying the backend service
The backend service in this sample uses a Docker configuration to specify its hosting environment. This customization means you must use the App Engine flexible environment instead of the App Engine standard environment.
To build the backend servlet and deploy it in the App Engine flexible environment, you can use the Google App Engine Maven plugin. This plugin is already specified in the Maven build file included with this sample.
Setting the project
For Maven to build the backend servlet correctly, you must provide it the Google Cloud Platform (GCP) project to launch the servlet resources into. The GCP project identifier and the Firebase project identifier are the same.
-
Provide the credentials that the
gcloudtool uses to access GCP.gcloud auth login -
Set the project to your Firebase project with the following command, replacing [FIREBASE_PROJECT_ID] with the name of the Firebase project ID you noted previously.
gcloud config set project [FIREBASE_PROJECT_ID] -
Verify that the project has been set by listing the configuration.
gcloud config list -
If this is the first time you're using App Engine, initialize your App Engine app:
gcloud app create
(Optional) Running the service on the local server
When you develop a new backend service, run the service locally before you deploy it to App Engine to rapidly iterate changes without the overhead of a full deployment to App Engine.
When you run the server locally, it doesn't use a Docker configuration or run in an App Engine environment. Instead, Maven guarantees all dependent libraries are installed locally and the app runs on the Jetty web server.
-
In the
firebase-appengine-backenddirectory, build and run the backend module locally with the following command:mvn clean package appengine:runIf you have installed the
gcloudcommand-line tool to a directory other than~/google-cloud-sdk, add the installation path to the command as shown in the following, replacing[PATH_TO_TOOL]with your custom path.mvn clean package appengine:run -Dgcloud.gcloud_directory=[PATH_TO_TOOL] -
If you are prompted Do you want the application "Python.app" to accept incoming network connections?, select Allow.
When the deployment ends, open http://localhost:8080/printLogs to verify that your backend service is running. The web page displays Inbox : followed by a 16-digit identifier. This is the inbox identifier for the servlet running on your local machine.
As you refresh the page, this identifier doesn't change; your local server spins up a single servlet instance. This is useful for testing, because there is only one servlet identifier stored in the Firebase Realtime Database.
To shut down the local server, enter Ctrl+C.
Deploying the service to the App Engine flexible environment
When you run the backend service in the App Engine flexible environment, App Engine uses the configuration in /firebase-appengine-backend/src/main/webapp/Dockerfiles to build the hosting environment that the service runs in. The flexible environment spins up several servlet instances and scales them up and down to meet demand.
-
In the
firebase-appengine-backenddirectory, build and run the backend module locally with the following command:mvn clean package appengine:deploymvn clean package appengine:deploy -Dgcloud.gcloud_directory=[PATH_TO_GCLOUD]
As the build runs, you see the lines "Sending build context to Docker daemon…". The previous command uploads your Docker configuration and sets it up in the App Engine flexible environment.
When the deployment ends, open https://[FIREBASE_PROJECT_ID].appspot.com/printLogs, where [FIREBASE_PROJECT_ID] is the identifier from Create a Firebase project. The web page that displays Inbox : followed by a 16-digit identifier. This is the inbox identifier for a servlet running in the App Engine flexible environment.
As you refresh the page, this identifier periodically changes as App Engine spins up multiple servlet instances to handle incoming client requests.
Adding Firebase and Google Play Services to the Android app
The client app uses the Firebase Realtime Database to store and sync messages and to record user-event logs. The client app uses Google Play Services to authenticate users with their Google account.
-
In Android Studio, select Tools > SDK Manager.
-
Select the SDK Tools tab.
-
Select Google Play services if it's not already selected.
-
Click OK to install it.
-
Select File > Open… and choose the
firebase-android-clientdirectory. -
Wait for the Gradle project information to finish building. If you are prompted to use the Gradle wrapper, click OK.
-
The changes to the project- and app-level
build.gradlefiles that you noted in Create a Firebase project have already been made in the sample code.
Running and testing the Android app
-
In Android Studio, with the
firebase-android-clientproject open, select Run > Run 'app'. -
Select a device or emulator running Android 6.0 with Google APIs as your test device.
-
When the app is loaded onto the device, sign in with your Google Account.
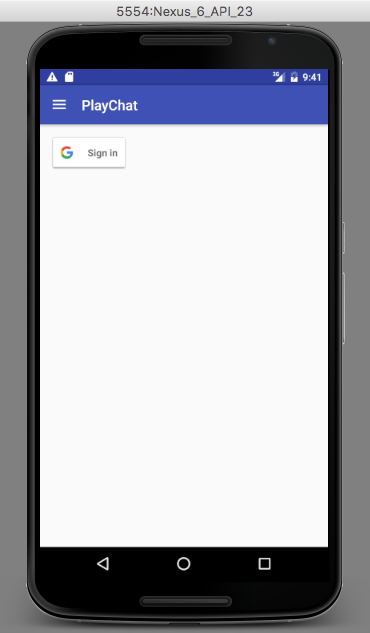
-
Click the menu to the left of the PlayChat title and select the books channel.

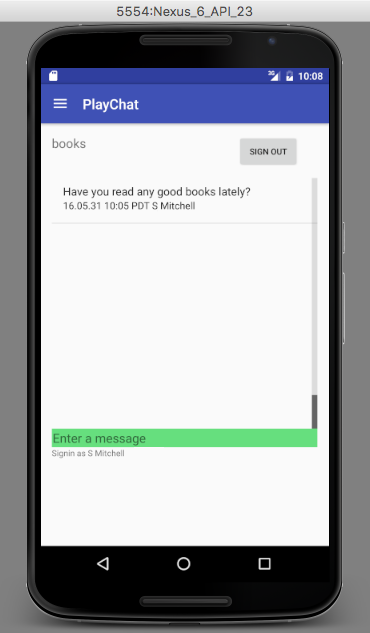
-
Enter a message.
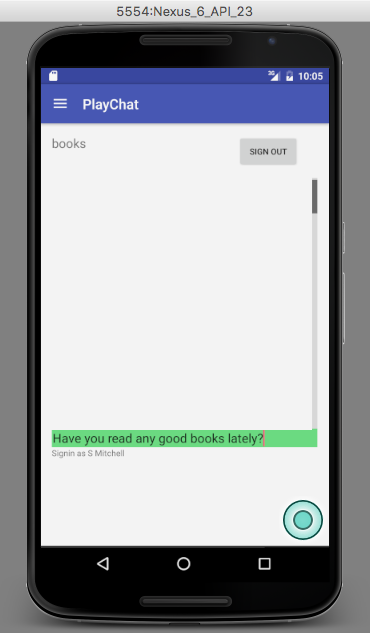
-
When you do, the Playchat app stores your message in the Firebase Realtime Database. Firebase synchronizes the data stored in the database across devices. Devices running Playchat will display the new message when a user selects the books channel.
Verifying the data
After you've used the Playchat app to generate some user events using the Playchat app, you can verify that the servlets are registering as listeners and collecting user-event logs.
Open the Firebase Realtime Database for your app, where [FIREBASE_PROJECT_ID] is the identifier from Create a Firebase project.
https://console.firebase.google.com/project/[FIREBASE_PROJECT_ID]/database/data At the bottom of the Firebase Realtime Database, under the /inbox/ data location, there is a group of nodes prefixed by client- and followed by a randomly generated key that represents a user's account login. The last entry in this example, client-1240563753, is followed by a 16-digit identifier of the servlet currently listening to log events from that user, in this example 0035806813827987.
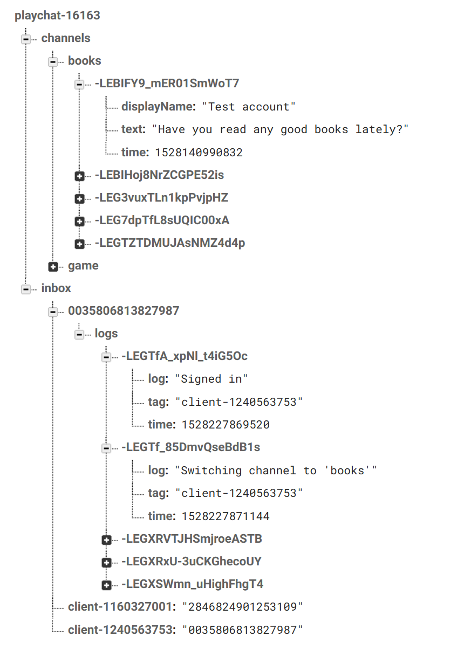
Immediately above, under the /inbox/ data location, are servlet identifiers for all currently assigned servlets. In this example, only one servlet is collecting logs. Under /inbox/[SERVLET_IDENTIFIER] are the user logs written by the app to that servlet.
Open the App Engine page for your backend service at https://[FIREBASE_PROJECT_ID].appspot.com/printLogs, where [FIREBASE_PROJECT_ID] is the identifier from Creating a Firebase project. The page displays the identifier for the servlet that recorded the user events you generated. You can also see the log entries for those events below the servlet's inbox identifier.
Exploring the code
The Playchat Android app defines a class, FirebaseLogger, that it uses to write user-event logs to the Firebase Realtime Database.
When a new user logs in, Playchat calls the requestLogger function to add a new entry to the /inbox/ location in the Firebase Realtime Database and set a listener so Playchat can respond when a servlet updates the value of that entry, accepting the assignment.
When a servlet updates the value, Playchat removes the listener and writes the "Signed in" log to the servlet's inbox.
On the backend service side, when a servlet instance starts, the init(ServletConfig config) function in MessageProcessorServlet.java connects to the Firebase Realtime Database and adds a listener to the /inbox/ data location.
When a new entry is added to the /inbox/ data location, the servlet updates the value with its identifier, a signal to the Playchat app that the servlet accepts the assignment to process logs for that user. The servlet uses Firebase transactions to ensure that only one servlet can update the value and accept the assignment.
After a servlet has accepted an assignment to process a user's event logs, it adds a listener that detects when the Playchat app writes a new log file to the servlet's inbox. The servlet responds by retrieving the new log data from the Firebase Realtime Database.
Clean up
To avoid incurring charges to your Google Cloud Platform account for the resources used in this tutorial:Delete the Cloud Platform and Firebase project
The simplest way to stop billing charges is to delete the project you created for this tutorial. Although you created the project in the Firebase console, you can also delete it in the Cloud Platform console, since the Firebase and Cloud Platform projects are one and the same.
- In the Cloud Console, go to the Manage resources page.
Go to Manage resources
- In the project list, select the project that you want to delete, and then click Delete.
- In the dialog, type the project ID, and then click Shut down to delete the project.
Delete non-default versions your App Engine app
If you don't want to delete your Cloud Platform and Firebase project, you can reduce costs by deleting the non-default versions of your App Engine flexible environment app.
- In the Cloud Console, go to the Versions page for App Engine.
Go to Versions
- Select the checkbox for the non-default app version that you want to delete.
- To delete the app version, click Delete.
What's next
-
Analyze and archive data — In this sample, the servlets store log data only in memory. To extend this sample, you could have the servlets archive, transform, and analyze the data, using services such as Cloud Storage, Cloud Bigtable, Google Cloud Dataflow, and BigQuery.
-
Evenly distribute the workload across servlets — App Engine provides both automatic and manual scaling. With automatic scaling, the flexible environment detects changes in the workload and responds by adding or removing VM instances in the cluster. With manual scaling, you specify a static number of instances to handle traffic. For more information about how to configure scaling, see Service scaling settings in the App Engine documentation.
Because user activity logs are assigned to the servlets through accessing the Firebase Realtime Database, the workload might not be evenly distributed. For example, one servlet might process more user-event logs than other servlets.
You can improve efficiency by implementing a workload manager that independently controls workload on each VM. This workload balancing could be based on metrics like logging requests per second or number of concurrent clients.
-
Recover unprocessed user-event logs — In this sample implementation, if a servlet instance crashes, the client app associated with that instance continues to send log events to the servlet's inbox in the Firebase Realtime Database. In a production version of this app, the backend service must detect this situation to recover the unprocessed user-event logs.
-
Implement additional features using Cloud AI products — Explore how to provide ML-based features with Cloud AI products and services. For example, you can extend this sample implementation to provide a speech translation feature using a combination of the Speech-to-Text, Translation, and Text-to-Speech APIs. For more information, see Adding speech translation to your Android app.
Except as otherwise noted, the content of this page is licensed under the Creative Commons Attribution 4.0 License, and code samples are licensed under the Apache 2.0 License. For details, see the Google Developers Site Policies. Java is a registered trademark of Oracle and/or its affiliates.
Last updated 2018-07-31 UTC.
How to Use Cloud Database in Android
Source: https://cloud.google.com/architecture/mobile-firebase-app-engine-flexible
0 Response to "How to Use Cloud Database in Android"
Post a Comment