I Didnt Finish My Art on Paint Tool Sai How to Save My Work
For many artists, it'south likely that you'll want to save transparent drawings at some signal, for their uses in layouts and graphics and otherwise. And given that Photoshop every bit an expensive investment and Pigment Tool SAI (which tends to lack transparency in various versions) is so pop, it can be difficult to know how precisely to attain this. This is where I'll attempt to help!
Checking if your Paint Tool SAI secretly has transparency
SAI can be a bit hard to effigy out when it comes to this, but some versions do indeed have transparency support. Here's how to practice information technology when you exercise have one of those versions:
For SAI 1
![[Pictured: SAI 1's layers, with the background layer selected and hidden.]](https://noseclub.bluwiikoon.art/img/tr-1.png)
Start of all, make sure any background layers you lot accept are hidden. SAI 1 won't evidence you any checkerboxes in the groundwork for transparency, just yous can check if your drawing is see-through by filling a layer underneath with blackness (and and then hiding information technology again, of course).
![[Pictured: A cute, see-through Nosepass with a black backgroud.]](https://noseclub.bluwiikoon.art/img/tr-2.png)
You tin see the black background on this Nosepass, so it'south expert to go. Make sure y'all hide that black layer again!
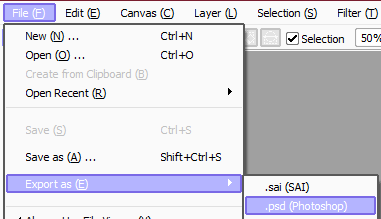
From hither, click on File, go to Export as, select .png, and type in whatever filename yous'd like.
![[Pictured: The File, Export and .png shown as stated above.]](https://noseclub.bluwiikoon.art/img/tr-3.png)
If your SAI supports transparency, the below dialog box should pop up afterwards you relieve information technology.
![[Pictured: A dialog box for PNG Save Options, showing 24bpp RGB and 32bpp ARGB options.]](https://noseclub.bluwiikoon.art/img/tr-4.png)
You want to select 32bpp ARGB (Each pixel have Opacity) for a transparent paradigm. With any luck, it'll work perfectly!
For SAI 2
Paint Tool SAI 2 makes transparency a bit easier to see. Similarly to above, hide any background layers, and so click on Canvas, hover over Background, and select Transparent (Bright checker).
![[Pictured: The Canvas, Background and Transparent options as detailed above.]](https://noseclub.bluwiikoon.art/img/tr-5.png)
If your cartoon is transparent, information technology should show immediately with some grey checkerboxes. For a very high res picture, y'all may take to zoom in to see them, though!
![[Pictured: Nosepass with grey checkerboxes in the background.]](https://noseclub.bluwiikoon.art/img/tr-6.png)
And again, export information technology and relieve information technology. SAI 2 should handle any transparency automatically, equally long as you save your file as .png. This is very of import, so please make sure information technology'south .png.
![[Pictured: Fully transparent Nosepass!]](https://noseclub.bluwiikoon.art/img/tr-7.png)
Congratulate yourself on your luck, your version of SAI supports transparency!
When your version of SAI cannot make things transparent
It'southward unfortunate, merely with so many versions floating around some of them but can't practice it. Here is how you tin can work effectually that.
Step One: Ensuring your drawing is appropriate for transparency
Since virtually art programs starting time you with a white groundwork, including SAI, a lot of people don't experience the need to make full in white colouring (such every bit eyes) or make clean up any lite pixels that may leak from the linework. Past creating a temporary background layer underneath everything that's filled with black, you tin can set up these instances and ensure they await adept on every background.
![[Pictured: Identical Wooper drawings on a white and black background.]](https://noseclub.bluwiikoon.art/img/woop-1.png)
As y'all tin can see above, at that place's no pixelly edges or leaky colouring on the Wooper with a nighttime background, and its eye whites have been filled in. Otherwise, the Wooper would have black optics and wait a picayune spooky!
Stride Two: Preserving your layers in a cross-compatible format
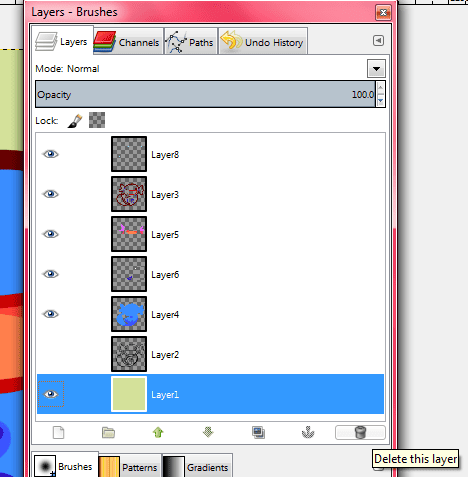
![[Pictured: Wooper shown with the layers used to make its image.]](https://noseclub.bluwiikoon.art/img/woop-2.png)
For the sake of ease it's vital that you take an file with layers rather than a apartment prototype. Information technology is withal possible to cut out a drawing that'southward been flattened onto an opaque background, merely we'll get into that a bit later.
You will ideally want to export your art as a .PSD, as seen above. While it may technically be a Photoshop file, sure free paradigm programs are compatible with .PSD files and can exist used to open up and edit them.
Step Three: Alas, yous must download 1 of them
With Photoshop presumably unavailable to you lot, you'll have to download a specific epitome-editing software to add transparency. The best choice for this is GIMP, as it's completely free of charge to use and uniform with both Windows and Mac. It may seem complicated at first, but don't worry!
Step Four: Opening files is a struggle
Once yous've downloaded GIMP and installed it (presumably with custom settings!), the very next stride is opening it upward and and so opening your .PSD file in it. Exist patient, as GIMP tin take a while to start. Information technology can also be a bit jarring, since by default it opens several small windows rather than i large window. Just as usual, clicking on File then Open volition get you to the file option prompt. Notwithstanding, I will recommend putting things you want to edit in a small and easily-attainable folder, since GIMP'southward file viewer has its own interface and lists everything past filename.
![[Pictured: GIMP's overwhelming file viewer, with a list of non-specific Nosepass filenames.]](https://noseclub.bluwiikoon.art/img/woop-4.png)
How could this happen to me...
In one case you find your image, it should be smoothen sailing!
![[Pictured: Wooper's layers didn't work as plan, and it looks a little spooky.]](https://noseclub.bluwiikoon.art/img/woop-5.png)
...However, if you utilise clipping grouping layers every bit much as I practice in SAI1, yous may want to merge those specific ones with the layer underneath when you're prepping the file. Whoops! Every bit of now, I don't know how to set up this in GIMP itself, just doing the needed edits to the .PSD in SAI is easy enough.
![[Pictured: Showing a layer with the Clipping Group option selected in SAI, and the layer underneath.]](https://noseclub.bluwiikoon.art/img/woop-6.png)
So to reiterate, merge Clipping Group layers (identifiable by the box being ticked and the pink line on the side as seen above) with the layer they're fastened to. If you lot do information technology correctly, your image will look exactly the same, except not cleaved when y'all open them in GIMP. Simple!
Step V: It'south finally time
Upon opening the fixed file in GIMP, the next step is refreshingly elementary: You find the background layer on your movie (whether it'south a white background or a temporarily coloured 1) and delete it.
The background of your flick should change to grey checkerboxes, as y'all tin see below. This means it worked!
![[Pictured: Wooper with a grey checkerboard pattern background, showing that it's transparent.]](https://noseclub.bluwiikoon.art/img/woop-8.png)
Stride Six: Saving your picture
GIMP naturally has an unintuitive way of saving images, too. Hither'southward what you'll want to do:
With that, your moving-picture show should exist transparent! Y'all can tell when you click on it in your folders, and the blue choice colour shows through!
From hither, information technology'southward down to you lot what you lot'll apply your transparent pictures for. Savour your newfound power, and take fun!

"But what if my image is flat?"
Non every image is blest with layers, so for those cases you'll accept to practice things the hard way. Depending on the style, yous can either zoom in really close with an eraser and delete the backgrounds past hand, or a simple selection trick will work.
Step One: Selecting and removing the unwanted infinite
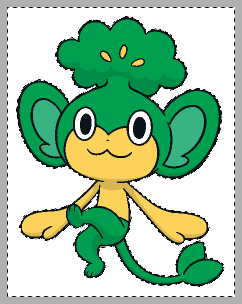
First of all, please make sure you're editing either your own art or art that is actually official, even if y'all take to triple-check to be certain. Editing other artists' piece of work isn't absurd, whereas official renders and official Pokémon images are available for anybody to use in articles and publications (and past extension, graphics).
So, what tin we practise about this Pansage's official art? The lines are a solid night colour so information technology's fairly safe to use a selection tool. For a plan like SAI, it'southward all-time to brand a dark layer underneath (fifty-fifty if it isn't visible at first) and edit your choice settings until you have most of the unwanted colour selected. Anti-aliasing is what y'all'll need for a smooth border, only if y'all're editing pixel art it'll have to be unticked for a pixelly border.
At this point a skilful trick is clicking on Pick and Increase, and then using Cut to remove the white space. Just for a small prototype similar this Pansage, it will more than than likely accept away a portion of the linework.
Step Two: Apace fixing the linework
Information technology won't always be a perfect solution, but for a pic similar this you tin can select the outside of the paradigm again, Capsize the selection, Increment it (or Amplify Selection 1px in SAI2), and fill up it with the outline colour on a layer underneath. You may besides have to increment it multiple times until it looks juuuust right. Information technology'south not platonic, and for many cases y'all might want to zoom in and do some editing to go it looking but right. At the very to the lowest degree, information technology's a quick method with quick results.
Step Three: In-depth editing
You may not be fully satisfied with how it looks at this point - this Pansage has some jagged edges along its lines and looks a flake messy. If you are willing to go the extra pace, y'all can zoom in and use a 1px anti-aliased brush and 1px eraser to set up the edges until it looks right to y'all. If it'due south your own art you lot're editing, it's fully down to your discretion.

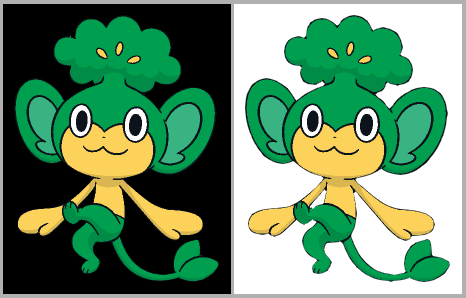
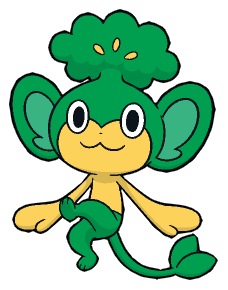
Since this Pansage is Global Link art, I only felt comfortable editing just the edges. It does look a lot better now, though, and it'south fully transparent! Only imagine all the cool graphics I could make with such a good, transparent friend.
Above all else, stay determined. You tin make all the transparent pictures if you try!
Page last updated on 14th November 2017 at 00:47 GMT.
Source: https://noseclub.bluwiikoon.art/transparency.shtml
0 Response to "I Didnt Finish My Art on Paint Tool Sai How to Save My Work"
Post a Comment